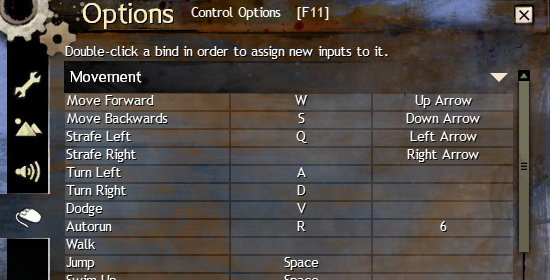
Here are my Guild Wars 2 key bindings for persons with small hands and even normal hands.
Follow this guide to set up your key bindings.
To access the key bindings option, while being in-game, press escape, “options”, “control options”.
The most important key bind is “auto-run” (numlock by default).
If you have a mouse with side buttons, assign one of the button to “auto-run”.
This will free you of having to keep pressed “W”, for running forward.
If you have a Razer Naga or any MMO mouse with side buttons, it is even better.
I have “auto-run” on my Naga’s “6” key and it works like a dream.
You have 10 abilities on your bar.
Setting up your abilities
1, 2, 3, 4 should be left by default, for the number keys.
You can assign 5, 6, 7, 8, 9 and 10 to buttons that are much easier to press.
For example: “Q”, “E”, “TAB”, “F”, “R”, “Z”, “X”, “C”.
Just double click on an “action” (7 for example), from options, and press the “R” key.
Click on overwrite.
The ability that was triggered by the “7” key can now be triggered by pressing “R” on the keyboard.
What I’ve noticed and didn’t liked about Guild Wars 2 was that I couldn’t keybind mouse scroll up and down, the easiest keybinds that can be used in a MMO game.
Mouse scroll click works, but I won’t recommend using this because the mouse button might stop working properly at some point if you keep pressing it.
It happened to me on my old Razer Abyssus which was a pretty expensive gaming mouse.
And last thing, you should definitely change the “V” key for evade to something very easy to press, “Q” or “E”.
I haven’t noticed anything to create macros, but since there are only 10 abilities, there is no really need to create macros.
Hopefully, now you have some good ideas on how to set up the Guild Wars 2 key bindings for small and normal hands.
These keybinds will give you a huge advantage compared to other players that don’t use them.
